Quickstart
Warning
This project will no longer be updated, since there is an improved version of gallerynpy that I recommend you to use: gallerynpyx.
Welcome to the Gallerynpy quick start manual. The purpose of this manual is to show you how you can add the gallery offered by gallerynpy to your game. We will do this using a basic renpy project like tutorial.
Therefore, it is assumed that you have a basic knowledge of how Ren’py works. If not, give the docs a thorough reading.
The gallerynpy scripts
Before you start creating the gallery, you need to download the files necessary for the correct functioning of gallerynpy. To get started you must download the latest release of gallerynpy.
Once you have downloaded gallerynpy, you must extract it into the game folder of the game.
The game folder of the game.
The default gallery
After extracting the files into the game folder, you can add some items to display in the gallerynpy gallery.
image gallerynpy img example = "images/concert1.png"

image gallerynpy animation:
    "concert1" with Dissolve(.1)
    pause .4
    "concert2" with Dissolve(.1)
    pause .4
    "concert3" with Dissolve(.1)
    pause .4
    "concert2" with Dissolve(.1)
    pause .4
    repeat

init python:
    gallerynpy.put_item("images", "gallerynpy img example")
    gallerynpy.put_item("animations", "gallerynpy animation", "concert1")
    gallerynpy.put_item("videos", "oa4_launch.webm")
And to display the gallery, inside the screens.rpy file and on the navigation screen, or wherever you want to display the option, you could put something like:
# the renpy default navigation
screen navigation():
    vbox:
        # ..... other options
        textbutton _("Gallerynpy") action ShowMenu("gallerynpy")
        # ..... other options
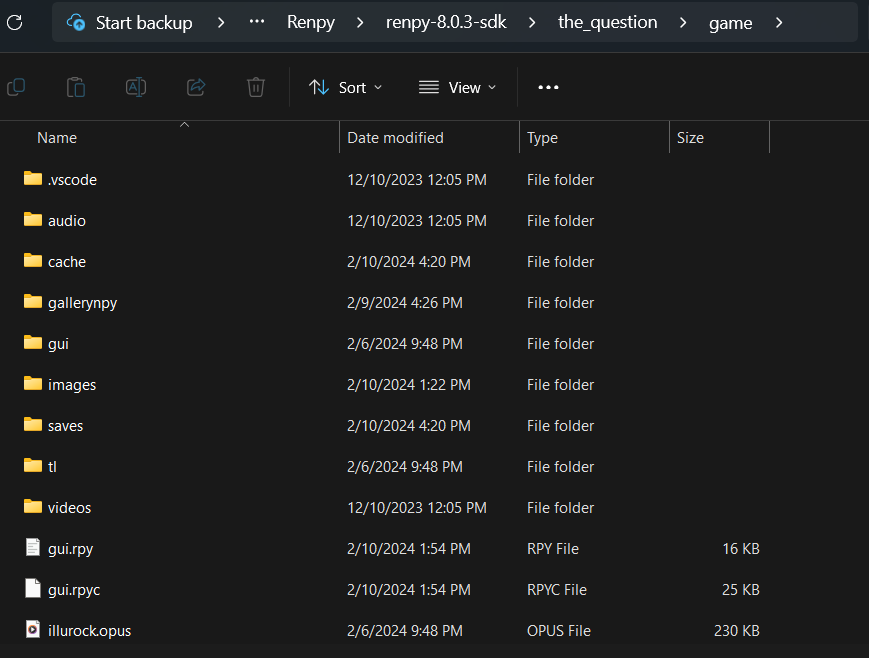
And that’s it, you now have a basic gallery to display in your renpy games.
A basic gallerynpy gallery.
The slider like gallery
When displaying the gallery, you may want to qualify the images, animations or videos to be displayed according to certain parameters.
For example, divide them by chapter or game character. Gallerynpy also offers methods for this.
Although the definition names may be a bit crude, gallerynpy calls them Slide and Slider.
Slide refers to a list of items (images, animations or videos) and Slider refers to a collection of Slide and others Slider.
For example in The default gallery, the function put_item() creates and places the item in the Slide with the designated name.
But if it does not exist, it creates it first.
Thus, the Slide are created: images, animations and videos.
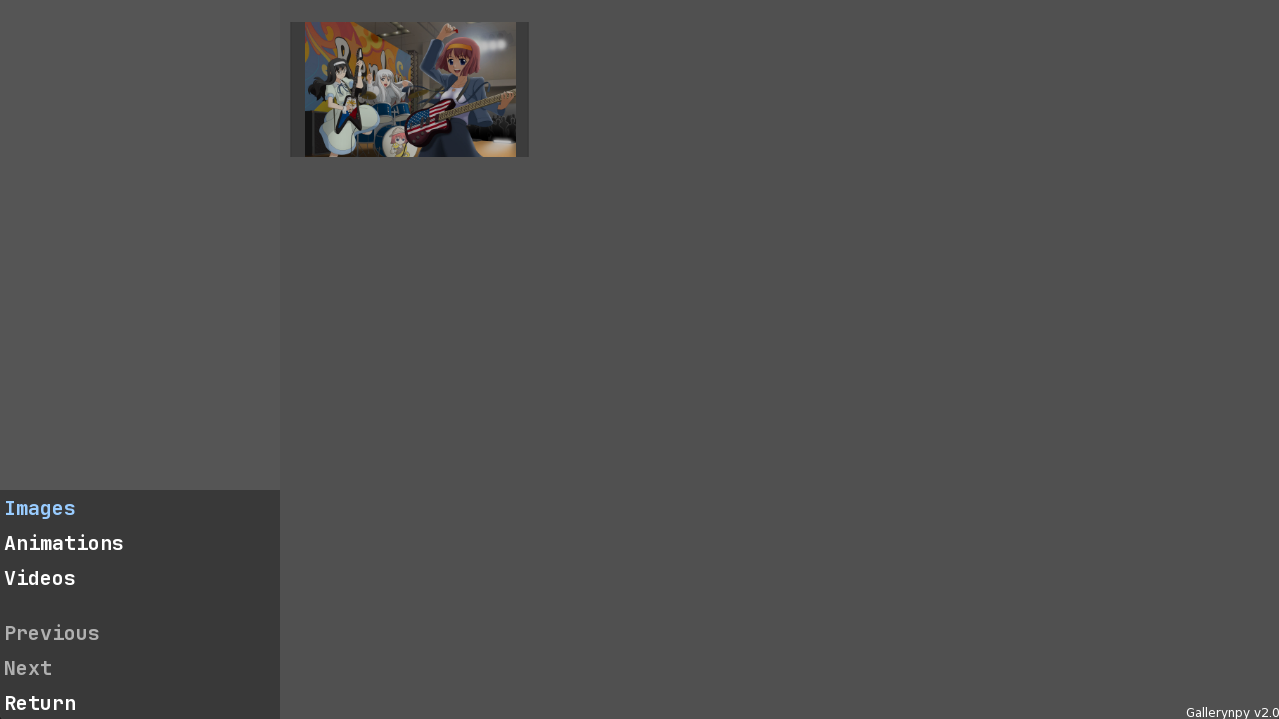
But if you wanted those slides to be inside a slider called Chapter 1, you could do something like this:
init python:
    chapter1 = gallerynpy.create_slider("ch1")

    images = chapter1.create_slide("images")
    animations = chapter1.create_slide("animations")
    videos = chapter1.create_slide("videos")

    images.put(gallerynpy.create_item("gallerynpy img example"))
    animations.put(gallerynpy.create_item("gallerynpy animation", "concert1"))
    videos.put(gallerynpy.create_item("oa4_launch.webm"))

    gallerynpy.custom_name_for("ch1", "Chapter 1")
Thus, the result obtained would be:
A basic slider like gallery
Gallery Items
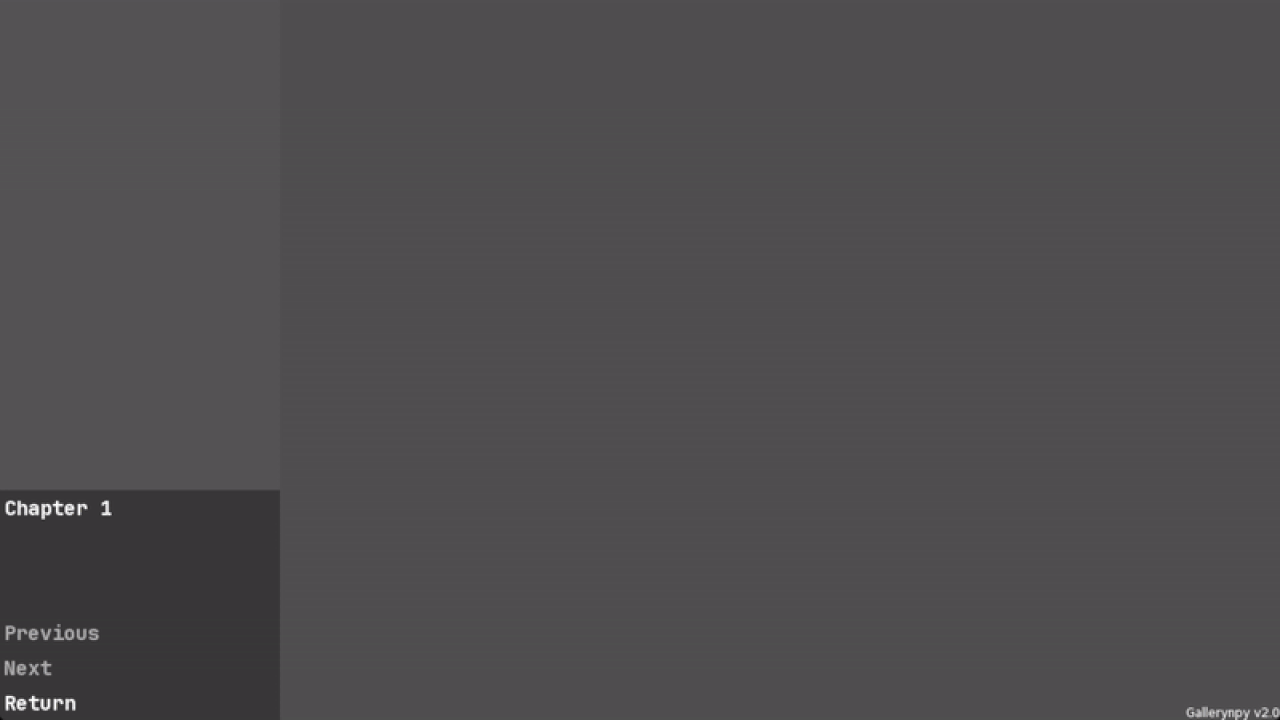
Animations with speed
In your gallery you may want to display animations with the option to view them with more speed according to a certain value, gallerynpy offers an extra display for these elements. For example, by editing the animation in The default gallery.
image gallerynpy animation:
    "concert1" with Dissolve(.1)
    pause .4 / gallerynpy.animation_speed()
    "concert2" with Dissolve(.1)
    pause .4 / gallerynpy.animation_speed()
    "concert3" with Dissolve(.1)
    pause .4 / gallerynpy.animation_speed()
    "concert2" with Dissolve(.1)
    pause .4 / gallerynpy.animation_speed()
    repeat

init python:
    gallerynpy.put_item("anim", "gallerynpy animation", "concert1", for_animation_slide=True)
    gallerynpy.properties.with_speed = True
    gallerynpy.custom_name_for("anim", "Animations")
These changes will enable the display of animations with speed and, depending on the option selected,
animations that use animation_speed() in the pause directive, as shown above, will have higher speed.
The animation screen with speed